Showing posts with label Arts. Show all posts

Friday, 21 May 2021

Art - Constellation Mountains

LI: To learn a new method of art through another student's knowledge.

This week, David hosted an art session and tutored the student's who didn't go to soccer on Wednesday. We learnt how to draw constellations as well as a mountain trio with interesting and significant patterns inside of them.

First, we made our practice copy on an A4 piece of paper. We used a ruler and sketching pencil to draw three different sized mountains. I drew a medium mountain on the left, a larger mountain on the right and a smaller mountain in the middle.

I then focused on doing the constellations. Instead of creating my own, I wanted to search on special constellations and draw them on my art piece. The constellations I drew were Gemini, Winter, Indus, Cepheus, Camelopardilas, Cassiopeda, Lyra and Ursa Minor. I drew stars and split lines to make my constellations.

Next I did the patterns within the mountains. For the medium mountain, I did an illusion pattern where it looks like there is a whole in the middle. For the smaller mountain, I drew a faded bottom with an eye at the top of the mountain. For the biggest mountain, I drew semi-circle waves.

I was able to create my larger copy using my smaller copy as a guide to what I was doing. I really enjoyed this lesson hosted by David and found that it was very fun because I have been hoping to do art for a long time and this was a valuable and significant lesson.

Friday, 7 May 2021

Personal Passion

LI: To create a DLO about your personal passion.

For this C.A.R.E award activity, the participant was sent to create a DLO talking about something they have a passion for. One of my personal passions is artistics because it is all about creativity and expressing yourself through art and original creation.

I created this DLO using images related to art, I talked more about my passion for art and told the audience that my favourite form of art is abstract paintings. I explained why I favoured this kind of art and gave some examples of abstract art.

This activity links to Excellence and Innovation under C.A.R.E because it requires the right kind of motivation to complete this workpiece and be able to explain your passion to an audience.

I really enjoyed this C.A.R.E activity because I was able to share one of my favourite things in life to an audience using a DLO poster.


Tuesday, 16 March 2021

Cultural Food Collage

LI: To practice searching for smart images and create a cultural collage.

This week, our task for Inquiry was to create a cultural photo collage using the new smart image searching skills we learnt last week.

First, we were given four different choices relating to cultural differences to base our collage off of. The choices were: cultural food, music, language or countries. My partner and I chose to create a collage of cultural foods.

We used our smart image searching skills and searched for cultural images with creative common license.

In our collage, we started by thinking about the different countries and the foods we should include. The cultural foods we included were: Mexican, Indian, Spanish, Italian, Chinese, Malaysian and African food.

I enjoyed this activity very much and creating this cultural food collage. I was able to practice smart searching for images and experimenting with the creative common license function on google.

Thursday, 25 February 2021

Optical Illusion Worm Art

LI: To experiment with dark, medium and light values and to explore optical illusion art.

Our art project was based around creating an optical illusion worm art piece. We practiced blending and shading colours. 

Optical Illusion Worm Art is a type of art that looks like it moves or plays tricks on the naked eye. Optical Illusion Worm Art looks like many worms that have bunched up.

The optical illusion effect is usually caused by the dark, medium and light values which is also known as blending or shading.

The worm effect is caused by the shapes used to create the art and the dark lines made by the vivid (the vivid was used to make the outlines of the shape). 

Dark, medium and light values play an important role in art, especially optical illusion art because it creates the 3D and shading effect.

We started by creating the outlines of the worms in black vivid. First, we drew a wavy line in the middle of the paper and drew 5 to 7 dots evenly on the line. We proceeded to connect the dots with semi-circles until the page was filled out.

After this, we used coloured pencils to colour in the worms. We shaded the colours by creating dark values on the outer sides of the woms and blend the colours lighter as the colours get closer to the middle.

I enjoyed this activity because I learnt a new kind of art type and was able to practice blending and shading colours with dark, medium and light values.

Thursday, 7 January 2021

Summer Learning Journey | Day 7 | Activity 1: 3D Lucky Paper Stars

For the first activity of day seven of the Summer Learning Journey, I created 3D lucky paper stars from strips of paper.

The purpose of this activity is to challenge our ability to create new things and follow instructions as well as channel our listening and understanding skills.

The first thing I did for this activity was watch a short tutorial video that explained how to create different sized 3D lucky paper stars in a step-by-step procedure.

To make 3D lucky paper stars, I took multiple strips of paper (the size of the strip of paper will alter the size of the 3D lucky paper star at the end of the procedure). I first created a knot and continuously folded the remaining piece of the strip of paper to make a pentagon. Finally, I made a dent into each side of the paper and it created a 3D star shape.

I really enjoyed creating multiple lucky stars and it was a great opportunity to reuse scrap paper, create decorations and learn how to make something new.

What I found most difficult about this task was repeatedly folding the remaining bits of the strip of paper so that it would match perfectly with the sides of the pentagon, however I managed to complete this task.

I could challenge myself by making even bigger 3D lucky paper stars because they are really fun to make and they look amazing.

LI: to use our comprehension skills to create something new. 

Unfortunately I could not take an image of the stars I created but here is a preview of what the 3D lucky paper stars look like.


Wednesday, 6 January 2021

Summer Learning Journey | Day 5 | Activity 2: Pigpen Cipher

For the second Summer Learning Journey activity for day five, I learnt how to decrypt the pigpen cipher code and use it to write messages.

The purpose of this activity is to learn how to use/encrypt and decrypt using the pigpen cipher code.

The first thing that I did was watch a video that talked about what pigpen cipher is and how to understand it. The video also explained why pigpen cipher has it's specific symbols.

Then I used my understanding of pigpen cipher to decrypt a code to find out which beach had a cave with treasure within it. This part of the activity was called 'Treasure Map'.

I learnt that the first nine letters of the alphabet are put onto a three by three grid in order from A to I. The letters in pigpen cipher are whatever lines of the grid they are touching or closest to.

The next nine letters of the alphabet are also in a three by three grid just like the previous nine letters. They also have the same symbols, however in the middle of each symbol is a dot or circle that indicates that it is the second set of letters.

The next four letters of the alphabet are s, t, u and v. Instead of in a grid, they are separated by the lines of an 'x'. Similar to the first eighteen letters of the alphabet, these letters in pigpen cipher are whatever lines of the 'x' they are touching or closest to.

The final four letters of the alphabet (w, x, y and z) are also separated by an 'x' shape. They have the same symbols as s, t, u and v but have circles in the center to indicate that they are the second set of the letters.

What I most enjoyed about this activity was applying my knowledge of pigpen cipher to encrypt my favorite beach into the code so others could decrypt it and learn more about me (most specifically what I like).

What I found challenging was decipher the name of the beach that had a cave with treasure within it, but I also enjoyed decrypting the code using my knowledge of pigpen cipher.

I found this activity really fun and delightful because I was able to learn a new secret code and I could use my knowledge of pigpen cipher to write messages or communicate with others that know this code.

LI: to learn, decrypt and use the pigpen cipher code.


Summer Learning Journey | Day 5 | Activity 1: Haka Kōkō Design

The objective of this Summer Learning Journey activity was to create our own Santa Claus clothing design by thinking about the features of Christmas and New Zealand.

The purpose of this activity is so be original and use our understanding of Santa, Christmas, New Zealand and summer to invent a Hana Kōkō design.

The first thing I did was brainstorm ideas on what I should include in my Hana Kōkō clothing design. I decided to include pohutukawa flowers and involve a summer theme because summer is the season in which Christmas takes place.

Once I thought about what to include in my design, I started thinking about the necessary clothing needed in summer. I used the google search feature on google draw to research clipart clothing that included the features I previously thought about.

I found a red shirt and added a pohutukawa flower on the front because red is a signature color of Christmas, and pohutukawa flowers were part of the design. I also found red shorts with a purple and yellow design to fit with the shirt, and because I couldn't find green or Christmas themed shorts. I included a sunhat and sandals because they are necessary summer-wear.

I named my Hana Kōkō design 'Summer Claus' because I thought it was unique and fit with the clothing design and theme. I also wrote what inspired me to create this specific design and why I included the certain features of my Hana Kōkō suit.

I found this activity interesting and exciting to do because I was able to use my ideas and inspiration to create something new. I most enjoyed coming up with the name of my Hana Kōkō  design. I encourage you to be creative and invent your own Santa Claus clothing design!

LI: to apply our ability to be creative and original.


Friday, 18 December 2020

Summer Learning Journey | Day 4 | Step it Up | Tānerore

Today, I completed the step it up level for the Summer Learning Journey activity called Tānerore. I created a unique kowhaiwhai pattern using the koru and kape.

Our kowhaiwhai pattern could represent either Tānerore or summer, and I chose to make it represent Tānerore because my previous kowhaiwhai pattern represented summer.

Tānerore is the son of Tama-nui te-ra. He performs the haka for his mother, Hine-raumati. A Maori myth states that when the weather is hot and sunny, you can see Tānerore performing the haka in the wiriwiri (faraway movements made by the heat of the sun).

The koru in the kowhaiwhai pattern that I made represents the wiriwiri movements in distant areas. The kape represents the ground or sky in which the wiriwiri movements take place. 

The colours I used for my kowhaiwhai pattern represent the heat which makes the wiriwiri and the uniform in which Tānerore was wearing when performing his haka.

This was a great opportunity to practice making more kowhaiwhai patterns. I think I could challenge myself by making a kowhaiwhai pattern that tells a Maori story, myth or legend.

LI: to investigate Maori history and create a kowhaiwhai patterns.
t


Summer Learning Journey | Day 4 | Step it Up | Insect/Summer Art

Today, I decided to do the next level of the Summer Learning Journey insect art challenge and completing the step it up challenge.

The step it up challenge is to make a summer scene or another insect using only leaves, flower petals or sticks/twigs.

I decided to make a summer sunset with flower petals and sticks I found on the ground. I made the  gradience of the sky using the petals of roses that grow in my front yard. I also used pink flower petals for the ocean (pink because of the sun's light). I found dead sticks as the frame for the art.

To make sure I wasn't killing trees or flowers, I used petals that were on the ground and around the roots of the bushes. I found sticks that were on the ground. There were sticks that were long, short, thick and thin.

I really enjoyed taking the opportunity to be resourceful and creating insect art. I think I could challenge myself by creating a different and more detailed setting. I also drew a visual reference of what the picture represents to prevent confusion.

LI: to be resourceful and make insect/summer art.


Summer Learning Journey | Day 4 | Activity 3 | Summer Haiku

This Summer Learning Journey activity for day four (the third activity) is to learn about haikus and create your own revolving around summer.

The purpose of this Summer Learning Journey activity is to practice using your ability to use your knowledge and understanding of a topic and write about that. It also encourages you to use your understanding of syllables and rhyming.

A haiku is a short poem containing only three lines with a certain amount of syllables. The first line must have five syllables, the second line must have seven syllables and the last must have five syllables.

My haiku talked about the sound of the ocean waves, the feel of the sand on the beach and the many shells that lie on the sand and ocean floor. I also chose an image that related to summer to fit with the haiku.

I enjoyed creating my own summer haiku. It was also a great opportunity to use my creativity to write an original haiku using my knowledge and understanding of syllables and summer. Next time, I could challenge myself by writing more complex types of poems.

LI: to apply our understanding of syllables and summer to create a haiku.


Summer Learning Journey | Day 4 | Activity 1 | Rise Up

For this Summer Learning Journey activity (day four, activity one), I created and wrote my own text graphic chorus for a song.

The purpose of this activity is to be able to use your imagination to write about a topic or subject and think about how well those lyrics would go with a rhythm.

A chorus is the part of a song where the lyrics repeat. For example, in the song 'Rise Up' (which is the song we used as an example for this activity), the chorus is 'And we will rise (strong minds, strong heart), and we will rise (we all play a part), and we will rise, we'll never stop.

I created and wrote a chorus which is about 2020 and it's major events. There might have been other major events that happened in 2020, but I chose these specific events because of some kind of connection or relation they had to me.

In the chorus, I tried to maintain rhythm and rhyme. I repeated the first and last line because I thought it would go well with the rest of the chorus.

To make a chorus, a person should have ideas on what the topic will be for their song. They should also have ideas about the order of the lyrics and keeping it on topic. If they are making a rhyming chorus, they should think about the amount of syllables each word or sentence has so that it goes with the rhythm.

I really enjoyed taking the opportunity to create my own chorus for a unique topic. I could try challenging myself by creating a chorus on a certain topic chosen by a different person. I'd like you to try and make your own chorus!

LI: to create a chorus.


Thursday, 17 December 2020

Summer Learning Journey | Day 3 | Activity 3 | Optical Illusions: Step It Up!

Today, I tried the Summer Learning Journey day three, activity three optical illusions activity. I tried to complete the step it up task.

I created my own optical illusion using only the thick, black outline of circles. Originally, I was going to make an illusion with black and white stripes. I observed the shapes I had available and began messing around with the placement of those shapes.

My optical illusion turned out to look like a tunnel. I made this tunnel by putting the thick, black outlines of circles close together and on an angle. Because of how they were placed, they formed the shape of a tunnel. I decided to call this illusion 'Tunnel Vision'.

To make your own optical illusion on paper, you can mess around with lines or shapes and change the angle, curve or form of those shapes. Shading can also help with how the optical illusion is seen by a person, and it can change that person's point of view.

I really enjoyed taking the opportunity to create my own optical illusion and experiment with shapes. I could improve my ability to be creative and original, and challenging myself with more complex and advanced shapes.

LI: to experiment with shapes.


Wednesday, 16 December 2020

Summer Learning Journey | Day 3 | Activity 3 | Optical Illusions

For this activity (day three, activity three of the Summer Learning Journey programme), we learnt about a certain optical illusion of our choice.

The first thing that we did was think of a certain optical illusion that we wanted to find out about. The optical illusion I chose was called the Hermann Grid Illusion.

After that, we explained how this illusion works and what it does. The Hermann Grid Illusion has many white dots on a black background. Whenever a person looks at a dot, the dots on the opposite side of the black background will turn grey or black.

This is because our brain can't compare the colors from a distance, so it automatically sees the other dots as black or grey.

I enjoyed this activity the most out of the Summer Learning Journey activities I have done so far. I think I could choose a more complicated and complex optical illusion to research and learn about.

LI: to learn about an optical illusion.


Tuesday, 15 December 2020

Summer Learning Journey | Day 2 | Activity 2 | Insect Art

The Summer Learning Journey crew created an activity that encourages the participants to be resourceful and create art using things that they manage to find outside.

This activity is called 'Insect Art'. Items and objects like leaves, sticks and flowers can be used to make the certain features of an insect. LS1 searched around PBS to find bits of nature in order to make a certain insect of their choice.

I decided to make a butterfly using leaves and sticks. Instead of taking leaves off of trees, I searched around an area of the school where there are lots of trees and bushes. I found lots of dead leaves and gathered a few for the wings.

To make sure I wasn't killing trees or bushes, I found sticks around the roots of the trees and bushes. There were sticks that were long, short, thick and thin. I used the sticks for the antennas and the body.

I really enjoyed taking the opportunity to be resourceful and creating insect art. I think I could challenge myself by creating a more advanced insect like a dragonfly or a beetle.

LI: to be resourceful and make insect art.


Thursday, 24 September 2020

Art Collaboration | Blending Colours

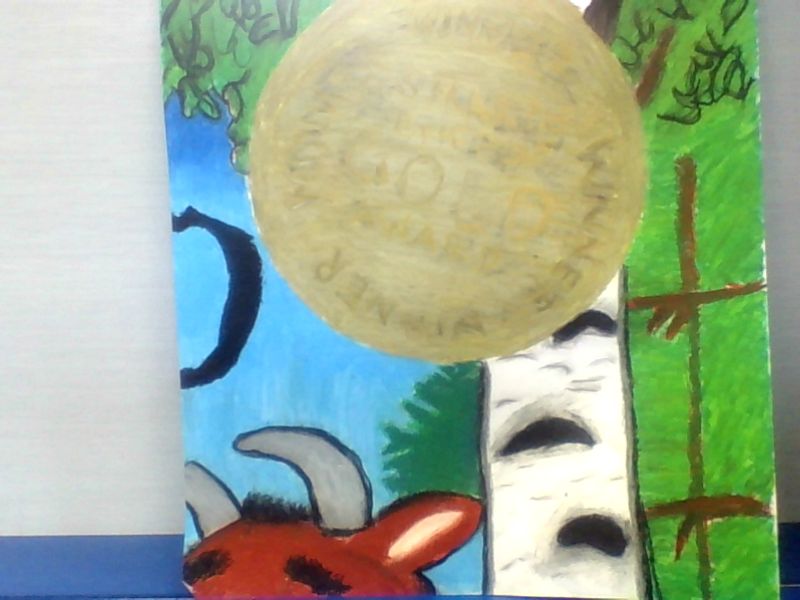
For the past three weeks, LS1 has been collaborating with each other to complete an art piece of the Gruffalo cover, which is the text that we have been using to practice the strategies inferring, connecting and visualizing.

First, we were assigned different parts of the cover to colour in. We did this art piece using pastels and an art technique called 'blending'.

We discussed our ideas of blending and what it is. Blending makes colours fade into a darker or lighter shade. Blending can also make a colour fade into a different colour.

After that, we began to colour in our part of the art. We talked to other groups about the colours and worked together to make sure the art piece matched up to fit accuratly. Groups talked to each other about the colour of the path, the grass, the trees and more.

The art piece has now been coloured in completely and is on the LS1 wall for display.

I enjoyed collaborating with other groups and learning how to blend colours. One thing I think I could improve on is knowing how to make different kinds of shades with the blending technique.

LI: to collaborate with others to finish a group art piece.
LI: to know how to blend colours with pastels.


Friday, 18 September 2020

Art Collaboration

 My class blogpost for art collaboration and colour blending can be found here:


Thursday, 17 September 2020

Art | The Gruffalo

Our art task is to recreate the cover of the Gruffalo story which is the story we have been using to visualise, infer and make connections. 

First, we were given different areas of the picture to colour in using pastels. We discussed a method called 'blending' where we use different colours to create a type of shading that makes the picture more detailed.

Then, (in groups) we started to colour in the picture. There were certain exceptions to our art such as: black pastel comes last because it is the darkest colour, use a paper towel to blend colours and use a cotton-bud to blend small areas of the picture.

For this task, we worked together with other groups to make sure that the end result would fit together.

This activity is two weeks worth of art.

I enjoyed this art lesson very much and I think the art piece came out very well.

LI: to collaborate and complete a group art-piece.
LI: to practice blending colours using pastels.


Friday, 12 June 2020

Art | Aboriginal Dot Painting

Aboriginal art is a type of art that tells a story using symbols. Aboriginal art first came from the aboriginies Australian culture. There are different types of aboriginal art such as rock painting, dot painting, bark painting and more.

We watched a story about how the kangaroo got it's pouch to get an idea of aboriginal stories. Then we practiced painting the different symbols on a white piece of paper using a cotton bud to get the write shape of the dots. We continued to practice using the paint to get the right consistancy of dots and lines.

Before starting our final piece, we needed a basic idea of the story we were going to tell. We then chose an animal shape to trace. There were: kangaroos, koalas, turtles, geckos/lizards, ostriches and sharks.

We used a chalk to outline and trace our chosen animal shape. Next, we painted the inside of our animal outline then moved on to painting and designing the story. Once we completed our artwork, we let it to dry.

My artwork tells the story of two kangaroos, a joey and a mother. They are in search of a place to escape the hunters. Their journey takes place at night under a sky of stars. They follow the footprints of other kangaroos to a place where they might find peace.

I enjoyed doing aboriginal art because I learnt a lot about the Aboriginies.

Thursday, 28 May 2020

Art | Geometric Masking

This week, I made Geometric Masking Art. Masking art is using tape to mask areas on the paper where we dont want to colour.

First, we needed to prepare paper, pastel colours and a tissue. Using tape, we applied a frame that acted as a border.

Next, I used tape to section off geometrical shapes on the glossy paper. We had to make sure there was a tab on the end of the tape so it would be easy to pull off.

When colouring with pastels, we needed to colour with the pastels in the same direction so it wouldn't look messy. 

Finally, I removed the tape to see the final result. I enjoyed art this week.

Work In Progress:
Final result:


Thursday, 20 February 2020

Art | Geometric Art House


LI: To create a house using google drawing shapes.

Today I completed my digital art of a grass/dirt house. We were shown a photo and we had to make a resembling house on google draws using shapes. First, I was trying to make the background and house completed. After finishing with the simple areas, I went more into detail and made the grass buds, a pathway, and included some stones in the dirt wall with stone. I enjoyed doing this activity and I think next time I could improve my detail in art and make it more realistic.